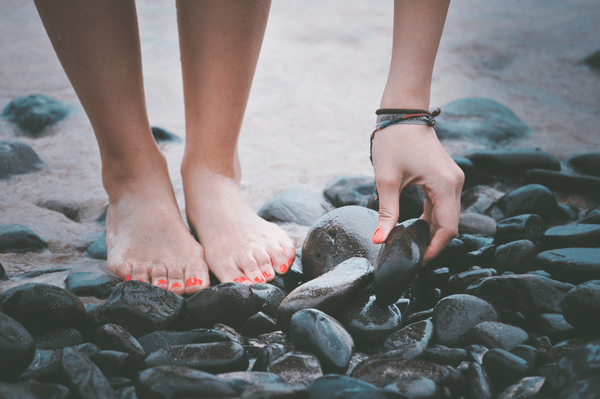
Have you heard that people judge you by your feet?
It’s true! How your feet look—especially in the summer when sandals are in fashion—says a lot about how you take care of yourself.
What do your feet say about you? Are they dry, cracked, and callused, or are they soft, smooth, and healthy-looking?
If you feel like they aren’t quite up to speed, we’ve got a five-step routine here to help change that. Even if your feet are in pretty good shape, you’ll find ideas on how to maintain that healthy, attractive look.
After all, good foot care isn’t just about appearance—dry, cracked skin makes you more vulnerable to picking up germs if you’re going barefoot, and can also put you at risk of infections.
So find a little time in your weekly schedule to give your feet some extra attention. It will boost your confidence the next time you go out in those great strappy sandals.
1. Soak & Soften First
There is some debate out there about whether you should soak before you exfoliate, or the other way around, or if you should soak at all (some say it actually dries skin).
We’re in the “soak first” camp for these reasons:
Exfoliating dry skin may be effective for some, but for others it may cause cracks and irritation in the skin. Soaking first is safer for all skin types. Soaking softens feet as long as you create the right kind of soak, making all other foot-care steps a lot easier.
We recommend the following soak recipe:
- a basin of warm water
- about a half-cup of mineral bath salts
- a half-cup of vinegar (optional—works well if you have dry, cracked heels)
- a couple teaspoons of baking soda
- a heaping teaspoon (more if your heels are really dry) of coconut oil
- your favorite herbs or essential oils for scent (optional)
Soak for at least 10 minutes, then remove feet and pat dry to prepare for the next step.
2. Exfoliate
This step actually involves two mini-steps. If you have rough heels, first use a pumice stone to smooth them out. Avoid the callus shavers and razors, as you can easily cut yourself or remove more skin than you should, creating a painful wound.
Wet the stone first, and then rub it gently over the calloused area. Use light, circular motions and stop the instant you feel any discomfort. Rinse and repeat if necessary.
Next, it’s time to exfoliate the skin on your whole foot. Go gently here, as often the skin on the top of the foot is really sensitive, so adjust your scrubbing accordingly. You can choose a ready-made natural foot scrub (we love our Dead Sea Scrub for this purpose), or easily make your own.
Here’s a recipe you may want to try:
- 1 cup Epsom salts (or granulated sugar or brown sugar)
- ¼ cup olive or almond oil
- 10-15 drops of your favorite essential oil (optional)
- 2 tablespoons raw honey (optional)
Mix the ingredients together in a small bowl, and then add using about a teaspoon-sized amount to scrub feet. You can use a sponge or your hands, and scrub gently, using a little more pressure on the heels and balls of the feet, where the skin is thicker. Rinse and pat dry.
3. Trim Nails and Push Back Cuticles
Try to do both of these steps always after you soak your feet. Toenails are generally thicker and more brittle than fingernails, which means if you clip them dry, they may split or fracture, which can be not only unsightly but painful. Cuticles are also a lot easier to push back and trim (if necessary) when they’re soft and pliable.
Start with your cuticles, as they can dry out quickly. (If they’re already starting to get dry, apply a little olive or jojoba oil.) Using a cuticle remover or stick, push back the cuticle, then trim only the excess with a cuticle nipper. Use caution to avoid cutting too much and bleeding.
Next, use toenail clippers and a nail file to trim and file your nails. Most experts recommend that you trim them straight across to reduce the risk of ingrown toenails. (Shaping them into a curve can cause this problem in some people.) Finish by filing the edges smooth.
Keep in mind that though fingernails often look nice when they’re a little longer than the fingers, it’s not so with toenails. Still, you don’t want to cut too short, either, as you can risk pain and again, ingrown toenails. Rule of thumb: cut so the edges of the nails reach the tips of your toes.
4. Moisturize
Feet need serious moisture to maintain the smooth, soft look you’ve just created with your soaking and exfoliation. That means something with essential fatty acids to penetrate deeper layers of skin, along with ingredients that will help skin hold onto moisture.
Think oils, butters and balms. You can’t go wrong with coconut oil and shea butter, for instance, mixed well and massaged into the skin. We also love our Coconut Body Oil as it sinks into feet and really helps make them look and feel softer and smoother.
Tip: In addition to moisturizing as part of your five-step routine, we also recommend moisturizing after every shower/bath, and before bed.
5. Treat and Protect
The above four steps will get most feet ready for sandals, but if your heels are really suffering, you may need a little more TLC.
Try creating your own foot salve to apply to your heels before bed. (We recommend wearing socks overnight to lock in the moisturizing ingredients.)
A salve recipe from Wellness Mama:
- ¼ cup shea or cocoa butter
- ¼ cup coconut oil
- 3 tablespoons beeswax
- ¼ cup magnesium flakes and 2 tablespoons boiling water
- Essential oils as desired
Add the boiling water to the magnesium flakes, and stir until you have a thick liquid. Allow to cool. Using a glass container of some sort (mason jars work well), mix the coconut oil, beeswax, and butter and place into a small pan with about one inch of water. Turn on medium heat and allow the ingredients to melt together.
Remove and cool, then pour into a medium bowl. Using a blender, mix the oil mixture while gradually adding the dissolved magnesium until all are well mixed. Add the essential oils at the end and whip together if desired.
Store in the refrigerator until needed, and apply to cracked heels at night.
Finally, don’t forget to protect the tops of feet with sunscreen when you go out. This is a tender area of skin that’s often neglected!
Do you regularly care for your feet to keep them looking sandal-ready? Please share any tips you may have.
Sources
Wellness Mama - Soothing Magnesium Foot Scrub
5 Easy Steps to Sandal Ready Feet is republished from Annmarie Skin Care Blog
No comments:
Post a Comment